Exposure is the amount of light you allow to reach the film or image sensor when you take a photo. This amount of light is largely determined by the aperture and shutter speed you set along with the ISO of your image sensor or film which we covered in the last article.
A scene has an exposure that determines the amount of light needed to correctly light the scene. The exposure needed for a scene is generally measured in exposure values or EV. An EV of zero represents the exposure obtained from an aperture of f/1 along with shutter speed of 1 second and an ISO of 100. Every change you make that halves the amount of light such as doubling the shutter speed or halving the aperture will increase the exposure by 1 EV. So a scene with an EV of 5 represents half the light that an EV of 4 does. This means that an aperture of f/5.6 (which is 5 stops or ½ x ½ x ½ x ½ x ½ the light) with the shutter speed left at 1 second and ISO left at 100 would result in an EV of 5. If we leave the aperture at f/5.6 and reduce our shutter speed to 1/125 of a second while leaving the ISO at 100, we would now have an EV of 12 as 1 second to 1/125 of a second is 7 stops (or ½ x ½ x ½ x ½ x ½ x ½ x ½) less light.
Most digital cameras can meter a scene and provide a pretty accurate exposure in most cases. This is usually a mode on the camera called something like automatic or automatic exposure. There might be several of these modes that give varying degrees of freedom to control settings other than shutter speed and aperture. The camera does this by analyzing the amount of light that is reflected off of the scene and back to the camera.
You can also use a light meter to determine the exposure for a scene. Most light meters can measure the light reflected back much as the meter inside your digital camera does. You can also use a light meter to measure the amount of light that is falling on the scene directly. This is called incident light. We will talk about light meters and using them in the next entry in this series.
There are also a few handy rules of thumb that can give you the exposure needed for a scene. The rule of 16 is a common one that states on a sunny day the correct exposure would be achieved with an ISO of 100, an aperture of f/16 along with a shutter speed of 1/100 second.
However you arrive at the exposure needed for the scene, once you have it the next task is to determine what combination of shutter speed, aperture, and ISO that you wish to use to produce this light. You will generally be mostly concerned with aperture and shutter speed with the ISO set to allow correct exposure. As we mentioned in the last article, shutter speed primarily allows you to freeze or show motion while aperture allows you to control depth of field or how much of your photo is in focus. After setting either aperture or shutter speed depending on what you wish to do in the photo, you must then set the other along with the ISO to produce the correct exposure to capture an image.
Once you have set the three to produce the perfect exposure you will sometimes find that things are a little off. The shutter speed may be a little too long allowing blurring of the subject or the aperture may be too large blurring parts of the image you wish to keep in focus. The benefit of knowing exposure is that you can adjust these values and keep them in balance. The concept of the stop, a change that doubles or halved the amount of light falling on the sensor, allows us to make an adjustment and keep the exposure in balance.
For example if your image is taken with a shutter speed of 1/60 second, and ISO of 100, and an aperture of f/5.6. You find that the subject of you photo is moving too much and blurry. So you decide to reduce the shutter speed to 1/125. This halves the amount of light reaching the sensor so you’ve decreased the exposure one stop. To compensate you must either increase the aperture one stop to f/4 or decrease the ISO one stop to 50.
This also allows you to make compensations if your image is underexposed (too little light reaching the sensor) or overexposed (too much light reaching the sensor). If your image is overexposed then you can decrease the aperture or shorten the shutter speed will reduce the amount of light falling on the sensor. A small adjustment will bring a slightly off image into balance.
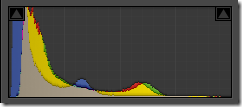
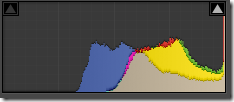
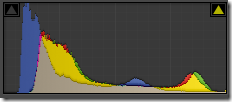
The digital camera is the perfect tool for learning exposure because your results show immediately through the LCD on the back along with the ability to display the histogram for each image. Looking at the image on the back will visually allow you to tell if the image doesn’t look right. The histogram is a graph that represents how light is distributed in your photo. The left end represents the shadows or dark areas of the photo while the right end represents the highlights or bright areas. In the middle are the mid-tones of your photo.
A properly exposed image should look like a nice gentle curve starting at zero on the left, be higher in the middle, and then drop down to zero again on the right like this:
An underexposed image the histogram will show will be shifted to the left starting above zero on the left usually meaning there is image data “lost” in the shadows. In an overexposed image, the histogram will be shifted to the right ending with the histogram at above zero meaning that there is data likely lost in the highlights. Don’t worry as much about the heights of the bars or the overall shape, but if there is a sign that data is being lost off either the right or left side.


With digital cameras it is easier to correct underexposure than overexposure. If you shoot in RAW mode (more about this to come) then you can pull data out of a slightly underexposed image, but things in an overexposed area are usually lost.
